How to export and download clips
Review the export queue, preview finished clips, select the clips you want, and download ready-to-post MP4 files.
3 min read · updated 2026-05-20
- Step 01
Open the export workspace
From the editor, switch to Export. The export workspace lists every clip in the project with its title, length, render status, and actions.
Screenshot pendingSliver export view showing clips ready to download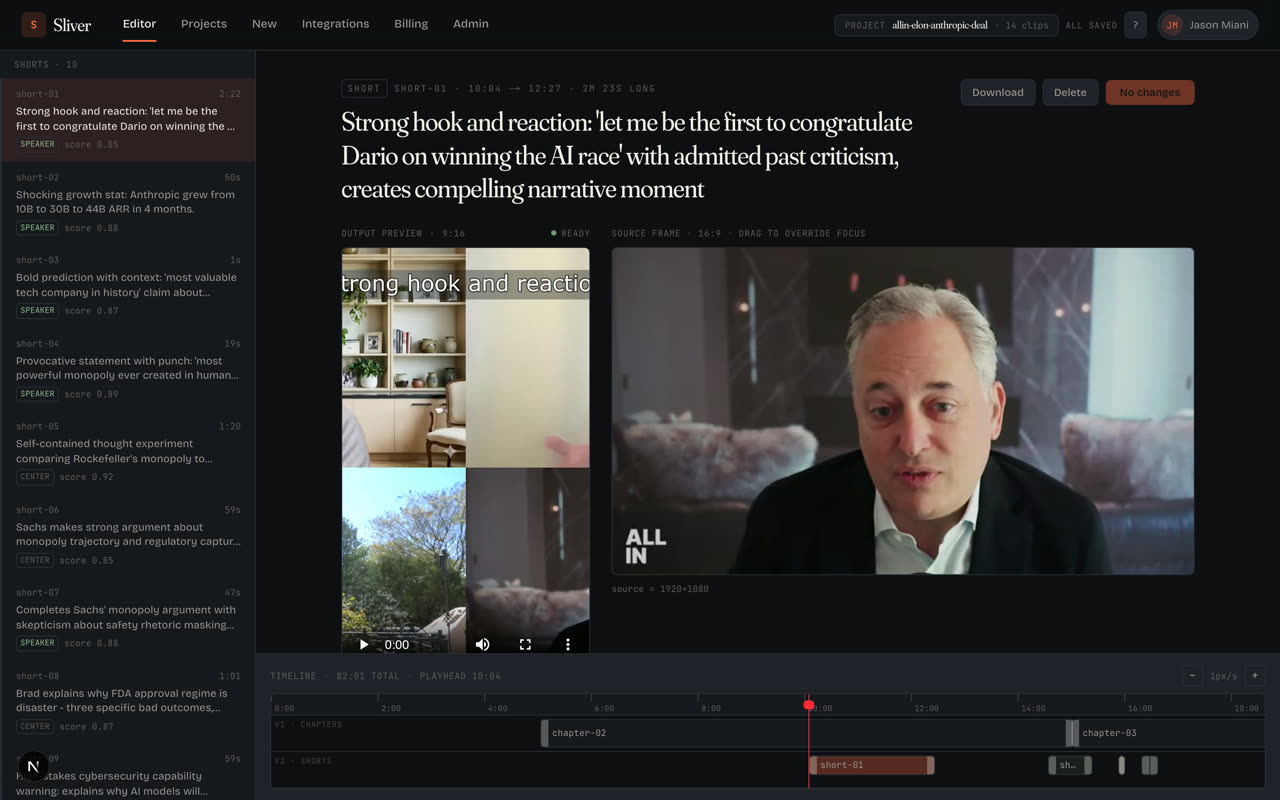
Only ready clips can be downloaded. Edited clips need a new render first. - Step 02
Select ready clips
Use Select ready to choose every finished clip, or check individual rows. The ready status means the current saved edit has a rendered MP4 available.
- Step 03
Preview before downloading
Select a row to preview the clip in the export workspace. This is the same MP4 that downloads, including the current trim, framing, captions, and overlays.
- Step 04
Download one or many files
Use Download on a row for one clip, or Download selected for a batch. Sliver names the files from the clip title when possible and saves them as .mp4 files.
- Step 05
Publish wherever your audience watches
Upload the downloaded MP4 files to TikTok, Instagram Reels, YouTube Shorts, LinkedIn, or another channel. Direct channel publishing is being staged behind integrations.
Good to know
Export specs
Shorts render as vertical 9:16 MP4 files with burned-in captions and overlays. Longer chapters keep the source-style aspect ratio when generated as episode output.
When a clip says edited
Edited means your saved settings have changed since the last finished render. Render it again before downloading if you want the newest version.
Related
Was this article helpful?
If something here is wrong, out of date, or unclear, email support@sliver.video and we’ll fix it. Real humans read every message.