How to create a project and upload a video
Start with the full recording you already have, save it as a project, upload the source, and generate the first batch of clips.
4 min read · updated 2026-05-20
- Step 01
Create the project first
Open Sliver and choose Start a project or Upload. Give the project a plain-language name before you upload, such as a podcast episode, stream title, webinar, interview, or product demo. Sliver saves the project first so the upload and generated clips stay attached to the right workspace.
Screenshot pendingSliver project workflow showing the upload step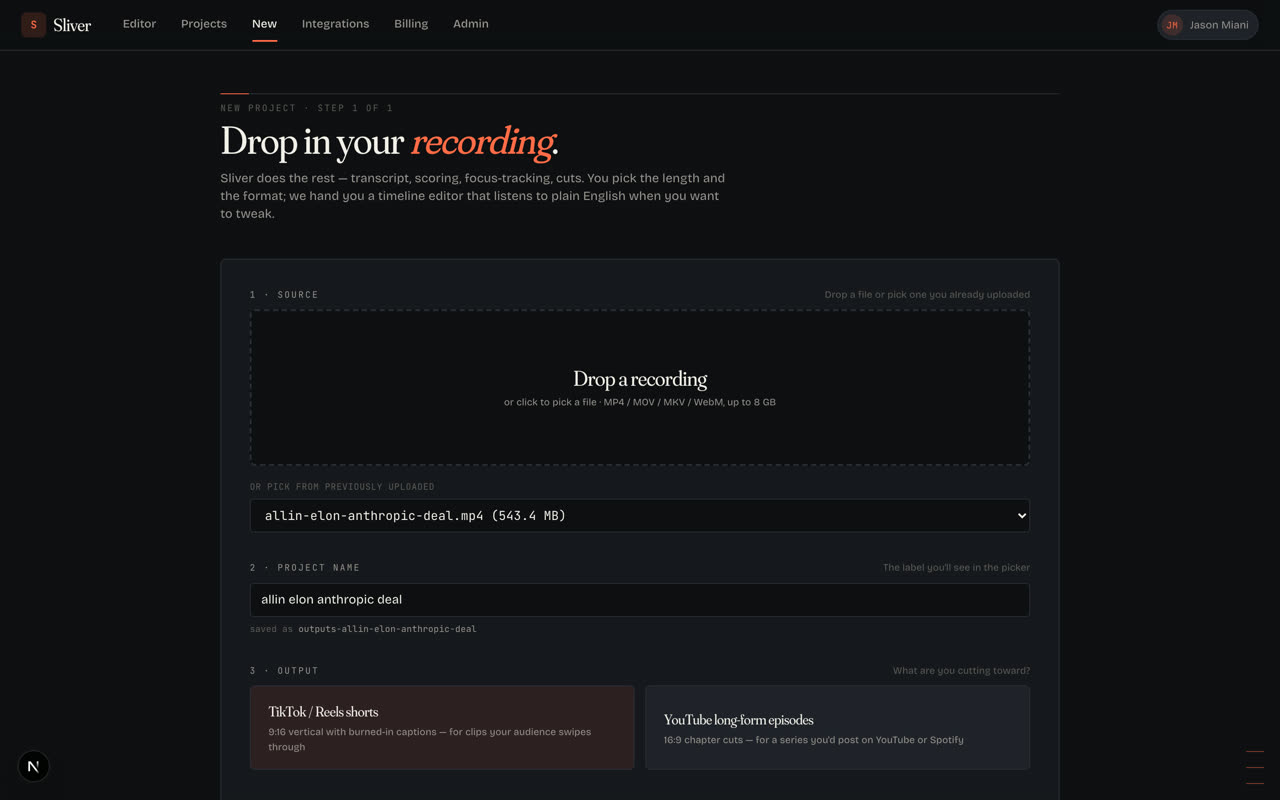
The current workflow moves through project, upload, generate, edit, and export. - Step 02
Upload the source recording
Drop the video into the upload step or choose it from disk. Sliver accepts common video files including .mp4, .mov, .mkv, and .webm. Large files upload directly to storage, so keep the tab open while the upload percentage is moving.
- Step 03
Choose what Sliver should make
For short-form output, keep Shorts selected. Use Episode only when you want longer chapters or condensed long-form output. Set the rough clip length and how many clips you want back. The defaults are designed for TikTok, Reels, and YouTube Shorts.
- Step 04
Pick the source layout
Leave Source layout on Auto for most podcasts, interviews, screen shares, webinars, demos, and phone videos. Choose Gaming only when the recording has gameplay with a facecam overlay that should become a stacked facecam-over-gameplay short.
- Step 05
Add optional creative direction
The Creative direction box is for editing guidance, not scripts or database commands. Good examples: prioritize funny gameplay reactions, keep captions bold and readable, avoid dead air, choose the strongest answer, or frame the speaker tighter.
- Step 06
Generate clips
Click Generate clips. Sliver analyzes the recording, finds strong moments, frames each clip, adds captions, and renders the first pass. When the progress panel says Clips ready, open the editor to review and export.
Screenshot pendingSliver generation progress from upload to rendered clips
The progress panel shows the current stage while Sliver builds the first edit pass.
Good to know
What counts as one video
One uploaded source video counts as one monthly video, even if Sliver creates multiple clips from it. Re-rendering edits inside the same project does not count as a brand-new upload.
If an upload is interrupted
If a large upload stalls or the browser closes, reopen the project and upload the same file again. Sliver can resume stored multipart uploads when the source is still attached to the project.
Related
Was this article helpful?
If something here is wrong, out of date, or unclear, email support@sliver.video and we’ll fix it. Real humans read every message.